11 minutes
Boost Your Productivity with Xilinx Vivado HLS
Introduction
Over the last couple of weeks I have written about using Vivado HLS on the command line and an open source tool which can help you do just that. In this post I will give you a look at my current development process and present a quick demonstration of how I approach a new project. I’ll cover the tools I’m using, my methodology and show you how to pick up and integrate these ideas.
Tools and OS Setup
My distro of choice is the fantastic Manjaro Linux. However, Xilinx’s Vivado Suite is only supported on Windows and RHEL, CentOS, SUSE and Ubuntu Linux. I personally use CentOS as it is a completely free, community supported, enterprise quality distribution which uses RHEL as it’s upstream source. I only use CentOS to provide the base for those tools which require it (Vivado, Matlab etc) and so it is relegated to running in a virtual machine. To achieve this I use VirtualBox and typically boot the CentOS VM on the command line using VirtualBox’s built in headless support. I have ssh configured so that I can remotely log in to the running VM with X window forwarding and have a shared data partition permanently mounted so all the CentOS based tools feel like they are running locally. Alongside the Xilinx design tools I also have hlsclt installed on the CentOS VM as it needs to interact with Vivado HLS directly.
On my main distro I have all the other important tools installed, including Python for modelling and scripting (I also have a full python install under CentOS), and Atomwhich is my main editing environment.
Atom
Atom is a sleek, modern and powerful text editor design by the folks behind github. It is customisable and extensible, with a wealth of community supported plugins. Whilst any editor and a terminal will allow you to get started using Vivado HLS on the command line, if you haven’t already got a blind dedication to Vim or Emacs I would recommend giving Atom a try. I personally use and recommend the following plugins to provide a powerful and efficient development environment:
- minimap
- platformio-ide-terminal
- project-manager
- tree-view-git-status
- autocomplete-plus
- language-python
- language-c
- tree-view
- tabs
- find-and-replace
With Atom set up I have a fantastic text editor, with code completion, syntax highlighting and other ‘must have’ features, with a built in terminal for interacting with my other tools.
Project Structure
I follow a standard structure for all Vivado HLS developments to simplify switching between projects, scripting builds and configuring source control. The project directory is named sensibly to reflect the piece of IP or design that it contains. The top level of the project contains two source folders ‘src’ and ‘tb’ and the hlsclt configuration file, config.py. All of the files required for the synthesisable design live in the ‘src’ directory and all of the testbench code and other supporting files (data files, input stimulus etc) live in the ‘tb’ directory.
- my_project_name
- src
- my_src_file_1.cpp
- my_src_file_1.h
- my_src_file_2.cpp
- …
- tb
- testbench.cpp
- testbench_supporting_file.dat
- config.py
Development Methodology
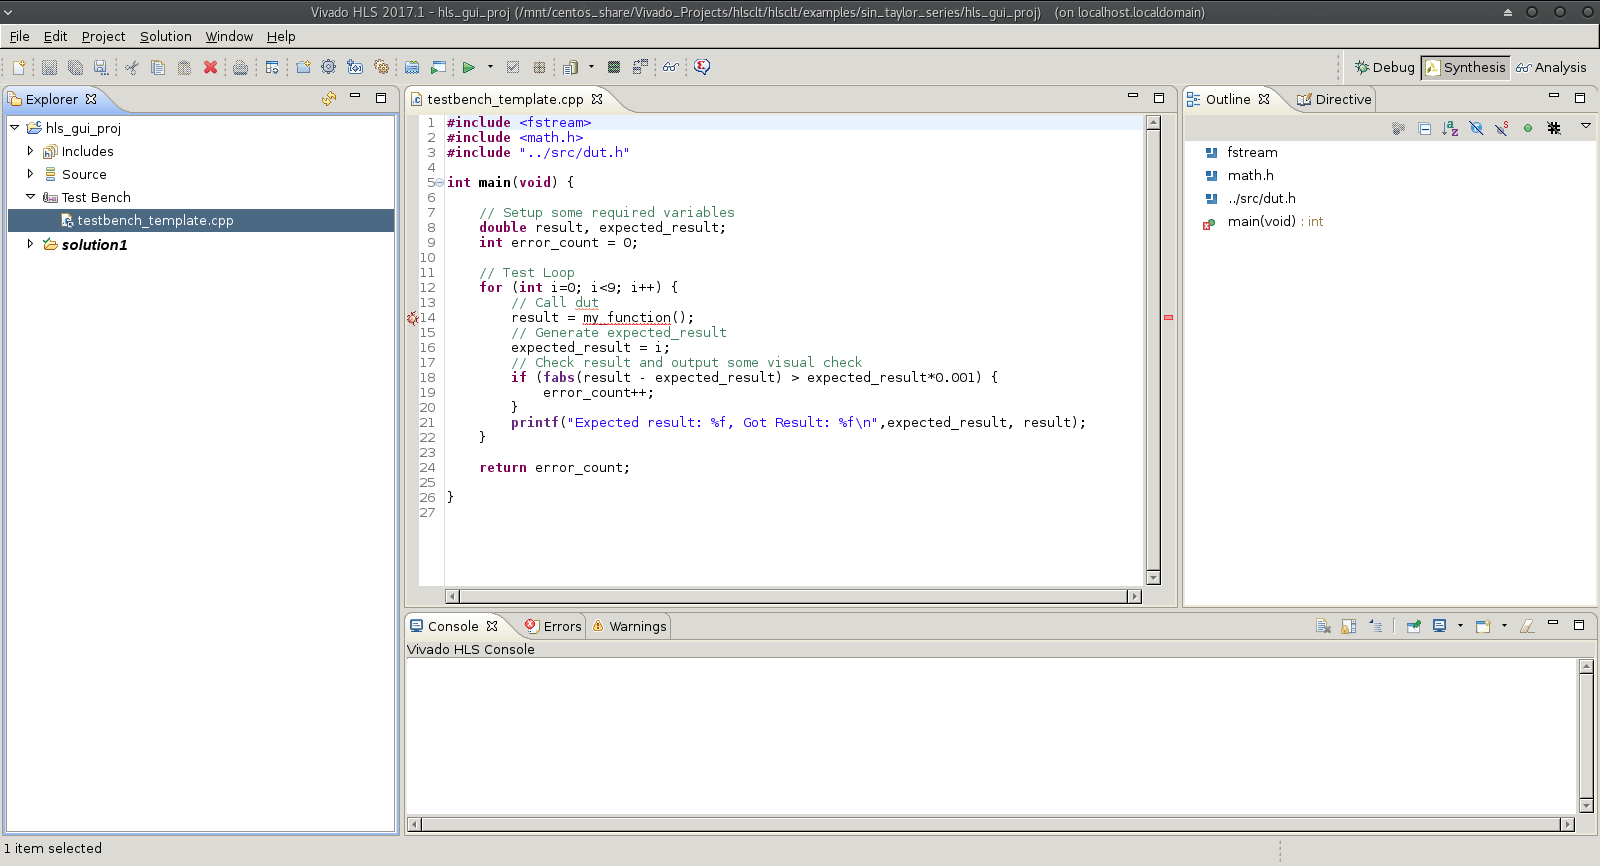
I start a new project by creating the project structure shown above. I typically bring in some template code for the testbench. This has some of the typical C includes and a skeleton main function. Finally, I create a blank cpp file for the main function.
After the structure is in place I normally fire up the Vivado HLS GUI (which goes against the grain of what I’ve been saying I know…) to do the initial code development. The HLS GUI offers issue highlighting which quickly shows when functions are not recognised due to missing C includes or incorrect function prototypes. I’ve found this to be a really helpful feature whilst getting the first version of some executable function code together. Unfortunately I haven’t managed to recreate this functionality in my Atom based editing environment yet so the HLS GUI gets used whilst I get enough code in place to run an initial C simulation.
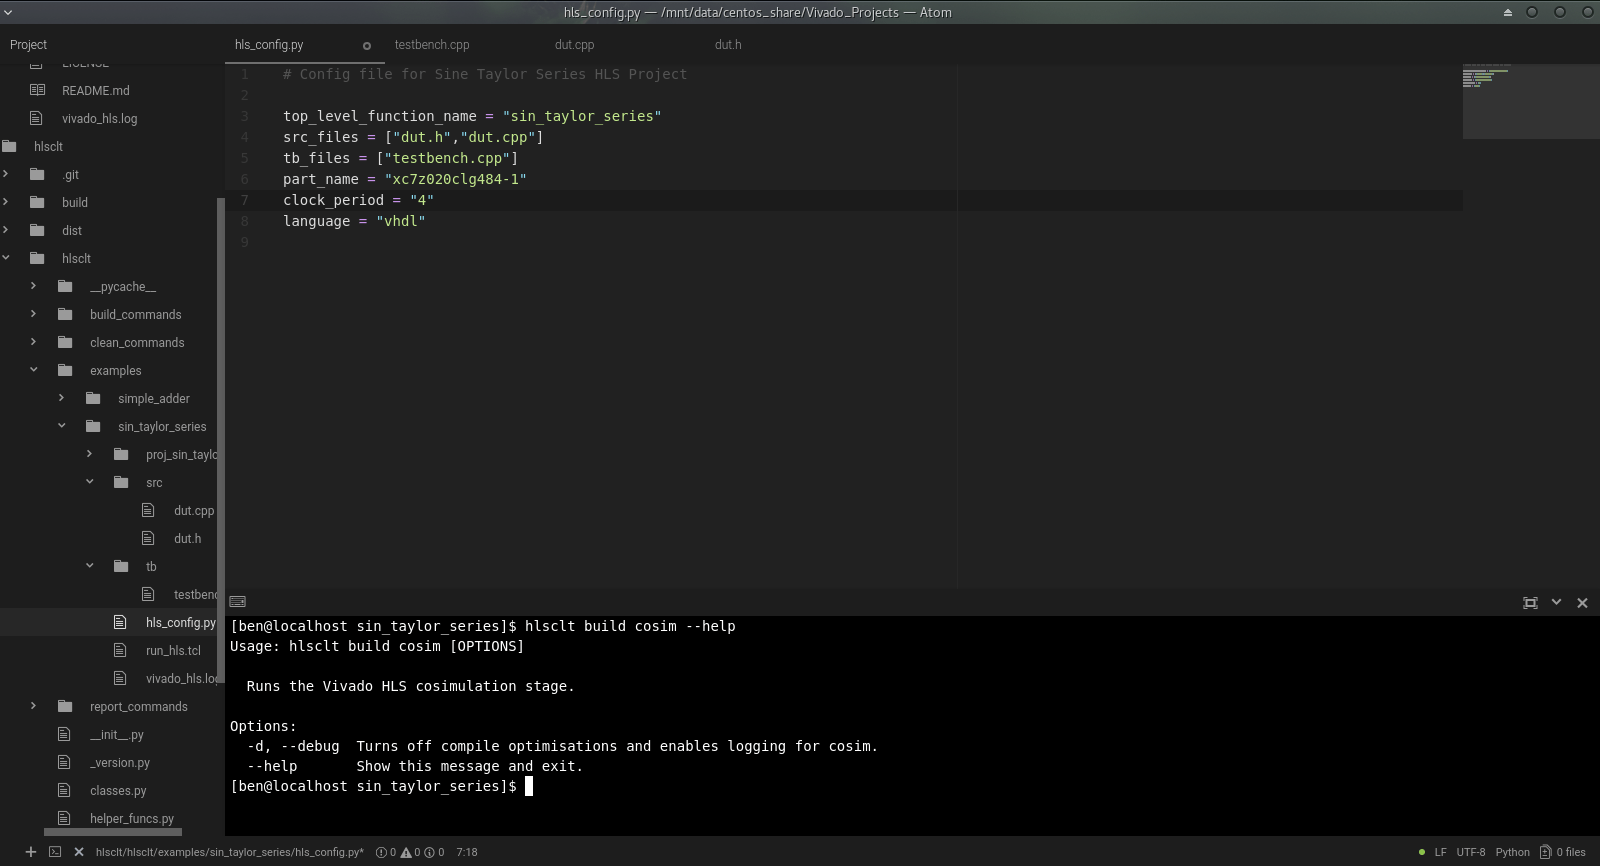
Once the initial code is executing and I can run a C simulation, even if the design doesn’t yet provide the intended functionality (and most often doesn’t) I move over to Atom. To do this I take the details from the project’s generated script.tcl and use them to create the ‘config.py’ configuration file for hlsclt. Using Atom and hlsclt I can then rapidly iterate through adding functionality and manipulating the existing code whilst executing C simulations to put in place the full functionality of the design.
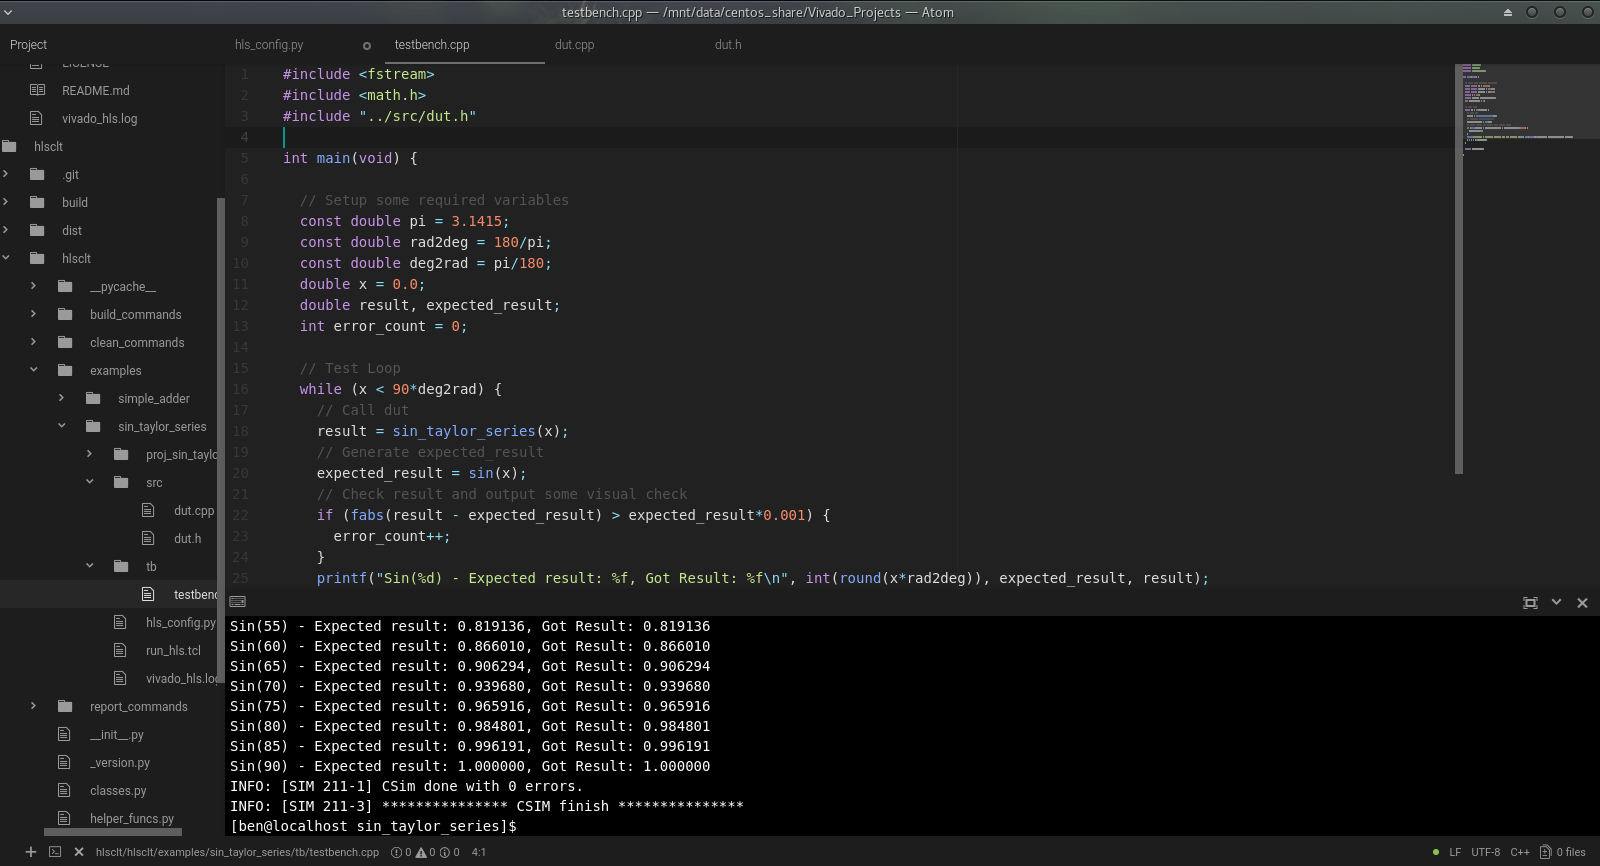
Atom and hlsclt continue to be the main tools when I take the design through to C Synthesis and Cosimulation. When the design has its full functionality (or at some other suitable point) I run an initial C Synthesis (no directives, just raw code) and Cosimulation. This Cosimulation should pass, if it doesn’t then something is really wrong! Of course, this relies on a well-designed and self-checking testbench. We will save discussion on good testing methodology for another time, for now let’s just say it’s important to have a good testbench.
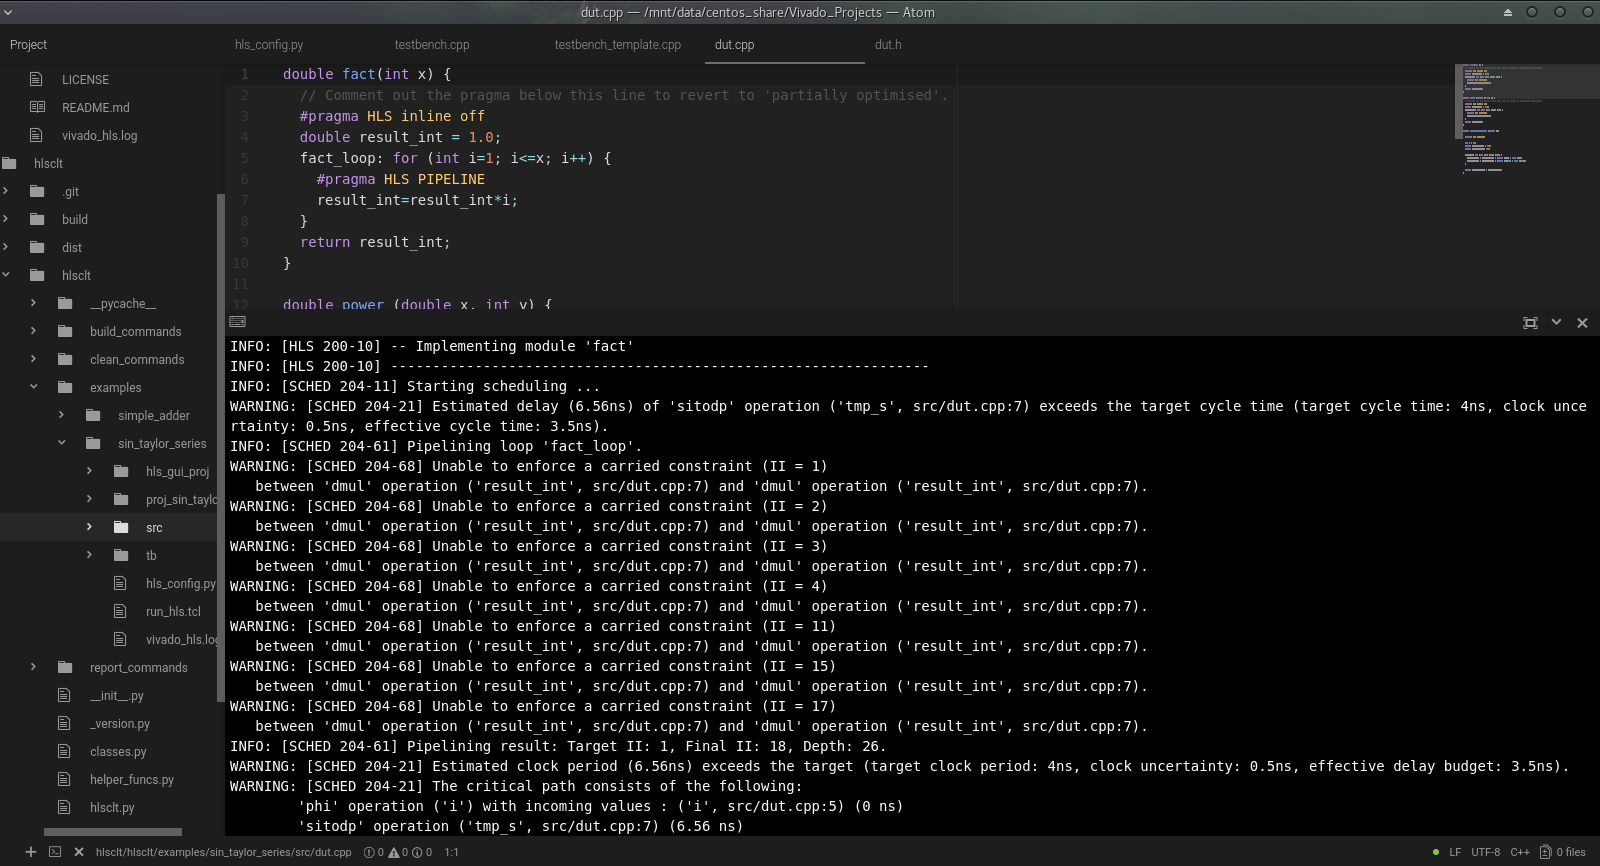
Now it’s time to optimise! Whether you are looking to crunch through your processing in the least possible time, or minimise the resource usage and create the smallest IP core possible, the optimisation phase looks pretty much the same. I start by analysing the C synthesis reports, taking a benchmark and looking for any obvious functions, processes, loops etc. which look like easy starting points. I also take a close look at the C Synthesis logs, paying particular attention to any warning messages. HLS likes to provide you with warnings when things are sub-optimal, and I would suggest you always aim to have zero warnings by the time you have a stable design (or at least very few warnings, which have all been documented and justified).
Aim for the big hitters first; get a ‘dataflow’ directive on if you think your design is suitable for it and look for loops that can be pipelined. If you’re aiming for throughput then look for opportunities to unroll loops or add pipelining at the function level. If you’re trying to minimise resources then look for opportunities to inline functions or time-share and re-use functions. I will say it again, keep an eye on your C synthesis log!
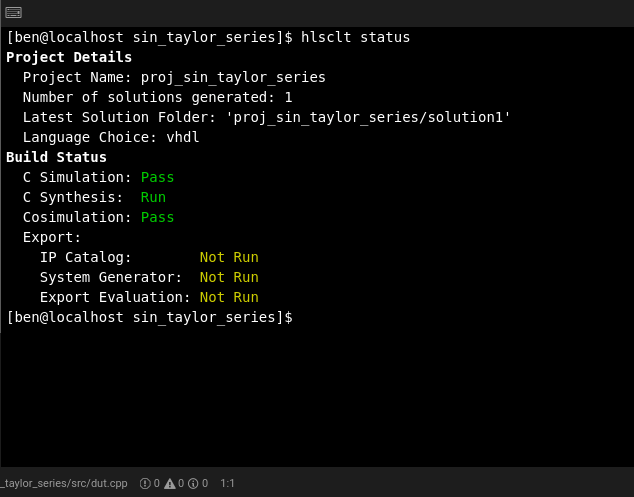
hsclt provides the ‘keep’ option, which is extremely useful during this optimisation phase. Add a --keep (or -k) argument to your hlsclt build command to instruct hlsclt to preserve your current Vivado HLS solution and use a new one for the current build. This way you can compare the results of multiple solutions to see the effect of your directives or code changes. Remember to regularly run a Cosimulation as you iterate through changes. Relatively simple changes to your build may introduce errors in Cosimulation, and you are much better off catching them just after you’ve made the offending change, rather than several changes later! hlsclt also offers the status command which is a quick way of viewing your project’s current status. It prints out the terminal a few standard details and then shows the run/pass/fail/not-run status of each of the HLS build stages, very useful as you rattle round C Simulation, C Synthesis and Cosimulation loops. Another useful feature is the ability to quickly load your project in the Vivado HLS GUI using the hlsclt open_gui command. This allows you to open up the optimisation views to see where you are burning control cycles, or where your dataflow sequence is going wrong, and then get back to your main editor to fix the issue and repeat the last build sequence.
Once the design is showing the performance you want in the post synthesis estimates/cosimulation, and it is reliably passing cosimulation, then it’s time to move on to the export. You can choose to package up the Vivado HLS output as either an input for the Vivado IP Catalog, which can then be incorporated in a Vivado project, or you can package for System Generator in order to use your IP core as part of a Xilinx System Generator Matlab/Simulink model.
It is important to perform an ‘evaluation’ on your export early on, I usually do so on my very first export at this point. The evaluate option tells the tool to run the packaged IP block through a Vivado Synthesis and Place and Route process in order to get much more accurate timing and resource details. I’ve generally found that the resource usage post Place and Route will be slightly lower than estimated. However, the achievable clock frequency can often cause trouble, especially for large designs, or those with a particularly heavy use of directives. If at this point the evaluation shows that Vivado can’t achieve your desired clock rate then you may need to fall back and iterate around another couple of C synthesis loops.
Once the export and evaluation stage is giving you the results you want then you can move into your standard design flow, or hand off your IP core to your trusty colleagues!
Source Control
One topic I haven’t mentioned yet in this post is source control/version management. I thought I would cover this all in one section instead of sprinkling it throughout the other topics. Source control should of course be a fundamental part of your development process, if it’s not already (even if you are a hobbyist or student), then I would recommend getting something set up now. Who knows when you might irreversibly break your source code, or accidentally delete an entire Vivado project!
Using Vivado HLS as described above allows for extremely easy integration with source control tools. I use Git for personal projects but have also used SVN professionally in this manner, and both work well. I have adopted a simplified version of Vincent Driessen’s Git branching model where I often don’t require release branches to be formed, but try to strictly follow the development/feature branching process. However, typically a HLS project will be just one part of a larger repository so the source control conventions may not always be yours to decide!
I usually perform an initial commit/checkin as soon as I have the skeleton project structure in place (to a development branch if this is part of a larger repository, or straight to master if this is a fresh repo), and then create my main feature branch (e.g. master -> develop -> develop-initial-code), which should take me through to the point where my initial function code is simulating. You should follow your normal conventions for when to commit/checkin, often after significant changes, and between working on different functional sections of your code.
A sensible time to merge your initial feature branch back into the main ‘develop’ branch (and maybe even the master branch) is when it is successfully passing C Simulation for the first time. At this point you are likely to move on to running the C Synthesis stage and exploring code changes/directives targeted at performance rather than functionality, so a new ‘feature’ branch should be started.
Multiple ‘feature’ branches can exist at the some point in time, for example to allow multiple engineers to explore optimisation of different modules/functions within a single large HLS project. I would strongly encourage a rigorous use of source control as one of the fundamentals of managing efficient team work within a HLS development. Parallel optimisation branches may of course mean more difficult merges if any of the function prototypes require changes, and it’;s worth flagging that scenario early if you think it will happen.
One of the most important rules of working with source control for HLS projects is to avoid including generated files in your commits. Including generated files can cause havoc when working as part of a team on the same project, and can shed doubt on the validity of your ‘current’ results even in simple projects. Using hlsclt provides an advantage here as you have access to the clean command which can automatically clean up and remove any generated files, leaving just your source code in place for a commit/checkin. Using the directory structure presented at the start of this post I (almost always) only have the src and tb folders and a config.py file under source control. Another good idea is to setup a .gitignore file or SVN:ignore property to provide a secondary mechanism of disregarding generated files. If you are using hlsclt then I recommend sticking with the default project name and not overwriting this in your config.py, that way you can simply follow the hlsclt conventions and ignore any ‘proj_*’ directories. When using hlsclt, it is also important to ignore the run_hls.tcl file that the tool generates.
Summary
Working with Vivado HLS can be an efficient and pleasant experience, especially if you stop and think about whether you currently have the best environment for developing and make steps to improve it. Described above is my current preferred development environment and process. It probably won’t work for everyone but I’m sure there will be some positive things to take away for anyone reading this post. I hope this will also demonstrate what hlsclt can offer and how to make the most of it. If you find yourself questioning whether your efficiency could be improved then perhaps give what I’ve shown here a go. See if you can streamline your process and boost your productivity.